Handmade Party Favor Tags and Thank-You Tags
Cut matching favor tags in four simple shapes with scissors and a hole punch, add a white writing panel and tie them on with twine.

Tutorial at a glance
Materials
- Cardstock in two or three colors, about 65 lb (176 gsm)
- White or cream paper for writing panels
- Glue stick or double-sided tape
- Twine or narrow ribbon, about 8 in (20 cm) per tag
- Mini clothespins (optional)
Handmade party favor tags do two jobs at once: they tell each guest which bag is theirs, and they carry the thank-you that would otherwise get lost in the rush at the door. A tag is also the smallest project on the party list, which makes it a good place to use up the cardstock offcuts left over from a banner.
All four shapes below can be cut with scissors and finished with an ordinary hole punch. A set of twelve takes about half an hour.
What you need
- Cardstock in two or three party colors, about 65 lb (176 gsm), plus white or cream paper for the writing panels
- Scissors, a ruler and a pencil
- A hole punch
- A glue stick or double-sided tape
- Twine, narrow ribbon or mini clothespins
- A pen that does not smear on your paper (test it on a scrap first)
- A small jar lid or a drinking glass to trace circles
The colored base should be cardstock; a thin tag curls and tears at the hole.
Four tag shapes you can cut with scissors
Pick one shape for the whole party, or two at most. A table of matching tags looks planned even when the bags underneath are plain.
| Shape | Suggested size | Best use |
|---|---|---|
| Luggage tag | About 2 x 3.5 in (5 x 9 cm) | Names plus a short message; the easiest to cut in a batch |
| Circle | About 2 in (5 cm) across | A name or initial on small bags and boxes |
| Scalloped circle | About 2.5 in (6.5 cm) across | A decorative base behind a plain white circle |
| Mini pennant | About 2 in wide x 3 in tall (5 x 7.5 cm) | Parties that already have a pennant banner |
Luggage tag. Cut a rectangle, then snip off the two top corners at an angle, about 1/2 in (12 mm) in from each side. Punch the hole centered between the clipped corners.
Circle. Trace a lid with a sharp pencil and cut just inside the line so no pencil shows, turning the paper into the scissors as you go.
Scalloped circle. Trace the lid, then draw small half circles all the way around the line, using a coin or a pen cap as the guide. Mark the top, bottom and both sides first and fill in between them so the last scallop is not squeezed.
Mini pennant. Cut a rectangle, mark the center of the bottom edge and cut from each top corner down to that mark. For a swallowtail, cut a notch up from the bottom edge instead.
Cut a matching batch from strips
Tags cut one at a time drift in size. Cutting from strips fixes the width of every tag with a single measurement, so only the length has to be marked.
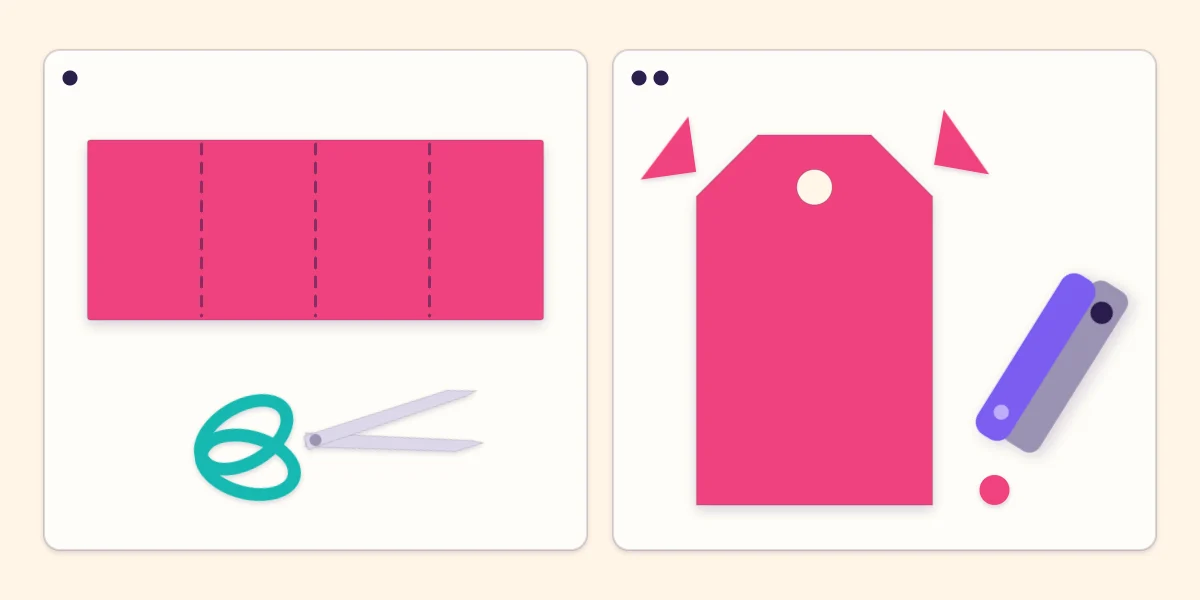
- Rule a strip across the short side of a letter sheet, as wide as the tag is tall: 3.5 in (9 cm) for the luggage tag. Cut it out.
- Divide the 8.5 in (21.6 cm) strip into four equal rectangles with light pencil marks, each a little over 2 in (5.4 cm) wide, and cut along the marks.
- Stack two rectangles at a time and clip the two top corners together so the angles match.
- Punch the hole in the first tag, then lay it on each of the others as a guide for where the punch goes.
One letter sheet gives three strips and twelve luggage tags. The guide to cutting, scoring and folding paper covers cutting clean strips and working through several layers at once.
Add a writing panel and reinforce the hole
Ink is hard to read on bright or dark cardstock, so glue a white panel onto the colored base. Cut the panel about 1/4 in (6 mm) smaller than the tag on every side, leaving an even colored border, and keep it below the hole. A glue stick is enough here; run it right to the panel’s edges so the corners do not lift.
The hole is the weak point of any tag. To reinforce it, punch a hole in a scrap of contrasting paper, then cut a small circle around that hole to make a ring. Glue the ring over the tag’s hole and re-punch through both layers if the edges do not line up. The doubled paper stops twine from sawing through.
Tip
Write on the white panels before gluing them down. A spelling mistake then costs one small rectangle of paper instead of a finished tag.
What to write on favor tags
Keep it short. A tag this size holds a name and one line comfortably, and the wording is yours to choose. Three approaches work well:
- A name tag: the guest’s first name only, written large, so bags can be handed out quickly.
- A thank-you tag: a few words of thanks for coming, signed with the birthday person’s name.
- Both: the guest’s name on the front and the thank-you on the back.
Rule a faint pencil baseline, write the name, let the ink dry and then erase the line. Size your writing to fit the longest name on the list.
Tying and attaching the tags
Cut twine or ribbon about 8 in (20 cm) long for each tag. Fold it in half, push the folded loop through the hole from the front, then pull both tails through the loop and tighten. This knot sits flat and keeps the tag facing forward.
Use the tails to tie the tag around a gathered bag neck or through the holes of a folded bag top. The tutorial on decorating plain paper favor bags shows closures that leave a place for a tag. On a box, slip the twine under a paper band, or tie it around the middle of a cardstock pillow favor box.
A mini clothespin is the quickest option and needs no hole at all: fold the bag top down and clip the tag to it.
Safety note
Mini clothespins and short lengths of twine are small parts, so keep an eye on them around very young children. Supervise children who help with the scissors.
Match the tags to the table
Tags look most deliberate when they repeat something from elsewhere in the room. Cut them from the same cardstock as the banner, and use the same shape and white panel for the handmade place cards, where a tag tied to a napkin doubles as a seat marker. Two colors plus white is plenty for something this small.
Frequently asked questions
What size should a party favor tag be?
About 2 x 3.5 in (5 x 9 cm) suits a luggage-style tag on a lunch-size paper bag, and about 2 in (5 cm) across suits a round tag on a small box. Scale the tag to the package so it covers no more than about a third of the front.
How do you stop the hole in a paper tag from tearing?
Use cardstock rather than thin paper for the base, and keep the hole at least 1/4 in (6 mm) from the edge. For extra strength, glue a small punched paper ring over the hole so the twine pulls against two layers.
Should the tags be written before or after tying them on?
Before. Write on the flat white panel, let the ink dry, glue the panel to the base and only then tie the tag to the bag. Writing on a tag that is already attached to a filled bag leads to wobbly letters and smears.