Felt Birthday Garland You Can Reuse Every Year
Cut circles, stars and hearts from felt and thread them on yarn with a blunt needle, or glue a tab over the cord, for a garland that lasts for years.

Tutorial at a glance
Materials
- Felt sheets, about 9 x 12 in (23 x 30 cm), in three or four colors
- Cardstock or cereal-box card for templates
- About 8 ft (2.4 m) of yarn, embroidery floss or thin cord
- Chalk or a dry sliver of soap for marking
- Fabric glue, tacky glue or hot glue for the no-sew build
Paper banners are made for one party. A felt birthday garland is made once and brought out every year, because felt does the two things paper cannot: its cut edges do not fray or tear, and it does not hold a crease after months folded in a box. Simple shapes cut from a few sheets of felt and threaded on a cord are all it takes.
Circles, five-point stars, hearts and small pennants all work. Two shapes alternating in three or four colors is plenty, and the garland can be sewn with a blunt needle or assembled with glue and no sewing at all.
What you need
- Felt sheets, about 9 x 12 in (23 x 30 cm), in three or four colors
- Cardstock or cereal-box card for templates
- Sharp scissors kept for fabric
- Chalk or a dry sliver of soap for marking, or pins
- Yarn, embroidery floss or thin cord, about 8 ft (2.4 m) for a 6 ft (1.8 m) garland
- A blunt yarn needle with a large eye (sewn build)
- Fabric glue, tacky glue or hot glue (no-sew build)
Craft felt and wool-blend felt
Craft felt is the thin, inexpensive kind sold in small sheets, usually made from synthetic fibers. It comes in bright colors, cuts easily and is perfectly good for a garland, though it may pill with handling.
Wool-blend felt is denser and a little thicker. It cuts to a crisper edge, holds a star point without flopping and feels more substantial, at a higher price. Either lasts for years as a wall decoration. If the craft felt on hand feels limp, cut each shape twice and layer the pair for extra body.
Cut clean felt shapes
- Make templates. Draw each shape on card, about 3 in (7.5 cm) across. Trace a glass for the circle. For a star, draw a circle, mark five evenly spaced points on its edge and join every second point with a ruler, then cut around the outline.
- Mark the felt. Hold the template flat and trace around it with chalk or the edge of a dry sliver of soap, both of which brush off afterward. Pens bleed into felt and stay visible. Alternatively, pin the template to the felt and cut around it without marking.
- Cut with long strokes. Use the full length of the blades and turn the felt, not the scissors, on curves. Short snips leave a stepped, chewed edge that cannot be smoothed later.
- Cut inside the line so no marking remains on the finished piece.
About 12 shapes of this size, spaced 3 in (7.5 cm) apart, fill a 6 ft (1.8 m) garland. One sheet of felt gives up to twelve circles, or slightly fewer stars. Supervise children with sharp scissors; felt needs more pressure to cut than paper.
Two ways to build the garland
| Sewn (threaded) | Glued (no-sew) | |
|---|---|---|
| Tools | Blunt yarn needle | Fabric, tacky or hot glue |
| Look | Visible running stitches across each shape | Clean front, cord hidden behind |
| Adjustable spacing | Yes, shapes slide on the yarn | No, fixed once the glue sets |
| Time | About an hour | About half an hour plus drying |
The sewn build: threading the shapes
- Thread the needle with the whole length of yarn and tie a loop about 12 in (30 cm) from the far end for hanging.
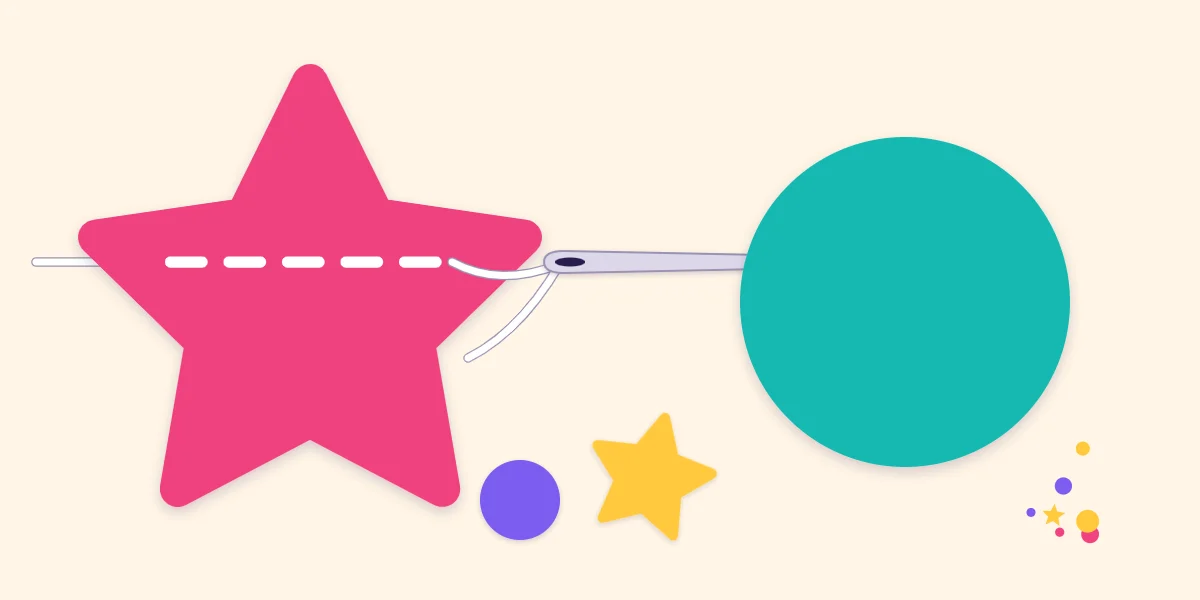
- Stitch across the first shape. Push the needle in from the back near one side, about a third of the way down from the top, and work a line of three or four running stitches straight across to the other side, finishing at the back.
- Slide the shape along and repeat with the next one, alternating shapes and colors.
- Space and lock. Once everything is threaded, spread the shapes evenly. To stop them drifting, tie a single knot in the yarn on each side of every shape.
The height of the stitch line matters. A cord through the upper third keeps most of the shape’s weight below it, so the shape hangs upright. A cord through the middle lets stars and hearts spin and tip face down.
The no-sew build: a glued tab
Add a tab about 3/4 in (2 cm) tall to the top of each template before cutting. Lay the cord across the back of the shape at the base of the tab, run a thin line of glue along the tab, fold it down over the cord and press. Clip it with a clothespin while it dries.
Fabric glue and tacky glue both hold felt well but need time; leave the garland flat for an hour or more. Hot glue grabs in seconds and is very secure on felt, but it is an adult job and can burn fingers through thin felt, so press the tab down with a craft stick instead of a fingertip. The glue and tape guide compares these adhesives on felt and other materials.
Watch out
Too much liquid glue soaks through felt and dries as a hard, dark patch on the front. Use a thin line and test on a scrap of the same color first.
Layering two colors
A smaller shape on top of a larger one adds contrast with very little extra work: a yellow star about 2 in (5 cm) across on a pink circle, or a small heart on a pennant. Fix the top layer with a few dots of glue, or let the running stitches pass through both layers so the cord holds them together. The pennant shape follows the same proportions as the paper pennant banner, scaled down to suit the felt sheet.
Cleaning and storing
Felt garlands rarely need more than a shake and a pass with a lint roller or a piece of tape wrapped around your hand. Spot clean marks with a barely damp cloth and let the felt dry flat. Soaking or machine washing can shrink or distort felt and loosen glue, so it is best avoided.
To store the garland, wind it loosely around a piece of cardboard so the cord cannot knot, and keep it somewhere dry and out of direct sun, which fades bright colors. The guide to storing reusable party decorations covers boxes and labels. Hang the garland with a removable method tested on a hidden spot first, and keep it away from candles and other heat sources.
Frequently asked questions
What kind of felt is best for a garland?
Ordinary craft felt works well and comes in bright colors at a low cost. Wool-blend felt is denser, cuts to a crisper edge and holds pointed shapes like stars better. If craft felt feels limp, layer two pieces of each shape.
Can you make a felt garland without sewing?
Yes. Cut each shape with a small tab at the top, lay the cord across the back, and glue the tab down over it with fabric glue, tacky glue or hot glue. The spacing is fixed once the glue sets, so lay the shapes out along the cord before gluing.
How do you mark felt without leaving lines?
Trace the template with chalk or the edge of a dry sliver of soap, both of which brush off. Cutting just inside the line removes any trace. Pinning the template to the felt and cutting around it avoids marking altogether.